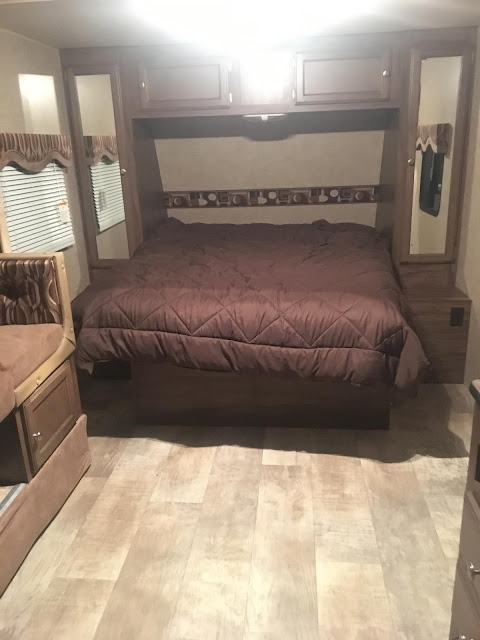
I will never understand why RV manufacturers make camper interiors so ugly. We knew when we saw our camper for the first time on the lot that it was the one for us. Just like shopping for a new home, there are a lot of things we loved about it but the wallpaper and fabric was horrible!
Making changes to a camper can be hard for a couple of reasons. Number one, ours was brand new straight-off-the-lot which makes it hard to feel good about making changes. Number two, adding something like a headboard takes caution as not to add weight to the camper or put holes in the walls.
About a year ago, I made a headboard out of cardboard, duct tape, quilt batting and fabric and it has worked amazingly to cover up the ugly wallpaper border staring back at me. A few months ago, I made a few upgrades to make it look even more decorative and thought it would be a great time to show YOU how to make one too!
Let's take a look at what we were dealing with first:
To start, measure the size of your mattress width or the width of the area you would like to cover. Then measure the height. As a note, make sure to account for the depth of the mattress hiding part of your new headboard (it helps with stability though too!).
Now grab the biggest and thickest cardboard you have and layer them to equal your earlier calculated dimensions. As you can tell, I had to use two boxes to make sure it really felt sturdy. I used a hot glue gun to secure the cardboard pieces together and then placed duct tape on all of the seams. You want it sturdy enough to stand up when holding it vertical. If it bends, just add more cardboard. In the photo below you can see the small square, I put that on as an extra bond because that's where it kept wanting to bend.
IMPORTANT: Before proceeding with the next step, go out into your camper and put this cardboard in place to ensure it fits! It's much easier at this step of the process to make corrections than later when you have to cut through fabric and batting!
When I made this originally, I just did a giant rectangle (see below), but I was feeling spicy this time around, so I decided to cut decorative finishes in the corners. Do this prior to wrapping your quilt batting or fabric on the cardboard just to simplify what you have to cut through.
Make sure to use a bowl or tool to ensure both sides are symmetrical. I found this massive Tupperware from 1995 and used a sharpie to mark the edges before cutting with sharp kitchen shears.
Once you are satisfied with your cardboard base, its time to add quilt batting. Lay your batting flat on the floor and place the cardboard on top of it. Start at one corner and work your way around tightly wrapping the batting to hot glue it down as you go (we will secure it more with a stapler once the fabric is added). Take a look at the front side to make sure there are no wrinkles or riffs before moving on.
For the next step, choose whatever fabric you want here - sky's the limit. Originally I had some hunter green cotton fabric that I used for this piece, but with my new décor, I wanted to make it black. I found this great outdoor fabric on sale at Joann's and bought a ton of it to use for this piece as well as reupholstering the fabric throughout our camper.
Just as you did with the batting, lay out your fabric on the floor and place your cardboard on top of it. This time, you will need to make sure the fabric is front-side-down so it will be the pretty side on the front of the headboard.
Work around the corners and depending on the thickness of your cardboard, use a standard stapler (if thin) or a staple gun (if thick). Mine was thick enough for a staple gun and it worked great! You can see in the photo below, I started on the bottom edge and worked my way around to the sides leaving the decorative corners last. Make sure your staples don't pierce the other side of the fabric!
Now the decorative corners are the hardest part. You want to be careful that you cover all areas of the batting and cardboard but also keep pulling and wrinkling to a minimum. I find the best way to do this is to cut several slits and wrap the fabric starting with the center of the curve and working your way out. It's not the prettiest on the back, but no one will see that side when it's done! Staple the heck out of those corners to ensure good coverage that won't budge.
When you finish, you should have something that looks like this!
This next step is my favorite! Walk it out to your camper and start putting it in place. I try to put as little holes in the walls as possible so I actually secured the headboard using upside down 3M hooks. Meaning - to actually install the medium metal 3M hook upside down so the hook acts to secure the headboard to the wall. I put three along the top and you can't even tell they are there!
Here's the finished product! It makes a huge difference without adding any weight or holes in your walls!


