Sunday, June 2, 2019

Can-o-py Love?!


If you’ve had an RV for while now and have ever rolled up the awning while wet, you probably are familiar with these lovely brown streaks…


On our last two camping trips we encountered quite a bit of rain. In fact, our trip to Lake Tawakoni was on a weekend that severe storms and tornados were predicted. BUT! When in Rome right?! It’s hard to trust a lot of the spring weather forecasts in Texas and we’ve cancelled trips in the past due to bad weather predictions when it ended up being a beautiful weekend. Although to be fair it did rain on that trip albeit still fun!


There is good news here though, your awning is not ruined, and you don’t have to spend any time scrubbing AT ALL! You might be thinking if there is little labor involved, that probably means it is expensive, but trust me it won’t break the bank either! 


Step 1, head to the Dollar General store and pick up a bottle of DG brand Mold & Mildew Remover for a whopping $1.65! (it's true, take a look here!)


Step 2, with your awning rolled out, and possibly a mask on your face (ew, chemicals), spray spray spray within two inches of the brown streaks and let sit until dry. 

Step 3, sit back and watch in amazement as the chemicals dry and the streaks fade away. 


Now, once dry, if you still have brown streaks (I did), you may need to repeat spraying and drying until you are satisfied with the result. 

Once, ready, pull out your water hose and wash the whole surface area to rinse any chemical residues off. Those awnings can be expensive to replace so the last thing you want is to roll that bad boy up and have it discolor, or worse, eat through the material. 

Finally, let the water dry and enjoy the fruits of your [minimal] labor! 


Tuesday, May 28, 2019

How to Make an RV Headboard


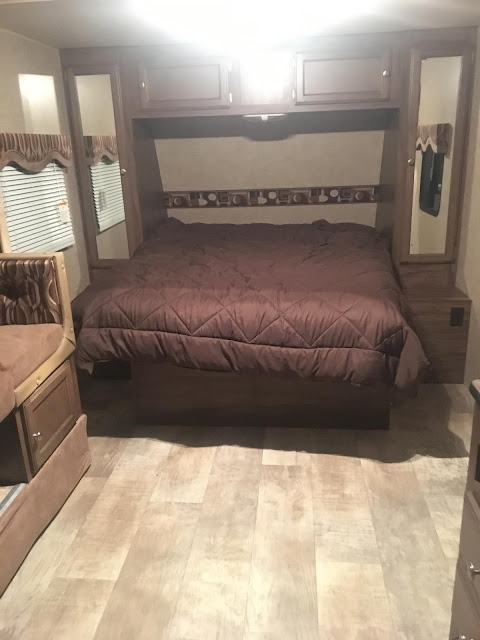
I will never understand why RV manufacturers make camper interiors so ugly. We knew when we saw our camper for the first time on the lot that it was the one for us. Just like shopping for a new home, there are a lot of things we loved about it but the wallpaper and fabric was horrible! 

Making changes to a camper can be hard for a couple of reasons. Number one, ours was brand new straight-off-the-lot which makes it hard to feel good about making changes. Number two, adding something like a headboard takes caution as not to add weight to the camper or put holes in the walls. 

About a year ago, I made a headboard out of cardboard, duct tape, quilt batting and fabric and it has worked amazingly to cover up the ugly wallpaper border staring back at me. A few months ago, I made a few upgrades to make it look even more decorative and thought it would be a great time to show YOU how to make one too! 

Let's take a look at what we were dealing with first:


To start, measure the size of your mattress width or the width of the area you would like to cover. Then measure the height. As a note, make sure to account for the depth of the mattress hiding part of your new headboard (it helps with stability though too!). 

Now grab the biggest and thickest cardboard you have and layer them to equal your earlier calculated dimensions. As you can tell, I had to use two boxes to make sure it really felt sturdy. I used a hot glue gun to secure the cardboard pieces together and then placed duct tape on all of the seams. You want it sturdy enough to stand up when holding it vertical. If it bends, just add more cardboard. In the photo below you can see the small square, I put that on as an extra bond because that's where it kept wanting to bend. 

IMPORTANT: Before proceeding with the next step, go out into your camper and put this cardboard in place to ensure it fits! It's much easier at this step of the process to make corrections than later when you have to cut through fabric and batting! 


When I made this originally, I just did a giant rectangle (see below), but I was feeling spicy this time around, so I decided to cut decorative finishes in the corners. Do this prior to wrapping your quilt batting or fabric on the cardboard just to simplify what you have to cut through. 


Make sure to use a bowl or tool to ensure both sides are symmetrical. I found this massive Tupperware from 1995 and used a sharpie to mark the edges before cutting with sharp kitchen shears.


Once you are satisfied with your cardboard base, its time to add quilt batting. Lay your batting flat on the floor and place the cardboard on top of it. Start at one corner and work your way around tightly wrapping the batting to hot glue it down as you go (we will secure it more with a stapler once the fabric is added). Take a look at the front side to make sure there are no wrinkles or riffs before moving on.

For the next step, choose whatever fabric you want here - sky's the limit. Originally I had some hunter green cotton fabric that I used for this piece, but with my new décor, I wanted to make it black. I found this great outdoor fabric on sale at Joann's and bought a ton of it to use for this piece as well as reupholstering the fabric throughout our camper. 

Just as you did with the batting, lay out your fabric on the floor and place your cardboard on top of it. This time, you will need to make sure the fabric is front-side-down so it will be the pretty side on the front of the headboard. 


Work around the corners and depending on the thickness of your cardboard, use a standard stapler (if thin) or a staple gun (if thick). Mine was thick enough for a staple gun and it worked great! You can see in the photo below, I started on the bottom edge and worked my way around to the sides leaving the decorative corners last.  Make sure your staples don't pierce the other side of the fabric! 


Now the decorative corners are the hardest part. You want to be careful that you cover all areas of the batting and cardboard but also keep pulling and wrinkling to a minimum. I find the best way to do this is to cut several slits and wrap the fabric starting with the center of the curve and working your way out. It's not the prettiest on the back, but no one will see that side when it's done! Staple the heck out of those corners to ensure good coverage that won't budge. 


When you finish, you should have something that looks like this! 


 This next step is my favorite! Walk it out to your camper and start putting it in place. I try to put as little holes in the walls as possible so I actually secured the headboard using upside down 3M hooks. Meaning - to actually install the medium metal 3M hook upside down so the hook acts to secure the headboard to the wall. I put three along the top and you can't even tell they are there! 


Here's the finished product! It makes a huge difference without adding any weight or holes in your walls! 


Saturday, February 16, 2019

TRIP: Hot Springs, Arkansas

Drop what you are doing and go now! Holy cow this place was so many things...beautiful, historic, kid friendly, what more could you want?! 

Hot Springs is just a two-hour drive from Queen Wilhelmina so we drove over after breakfast and arrived close to lunch. We stayed in the Hot Springs National Park - Gulpha Gorge Campground. It was literally surrounded by mountains with tall pine trees and the Gulpha creek running through it. 


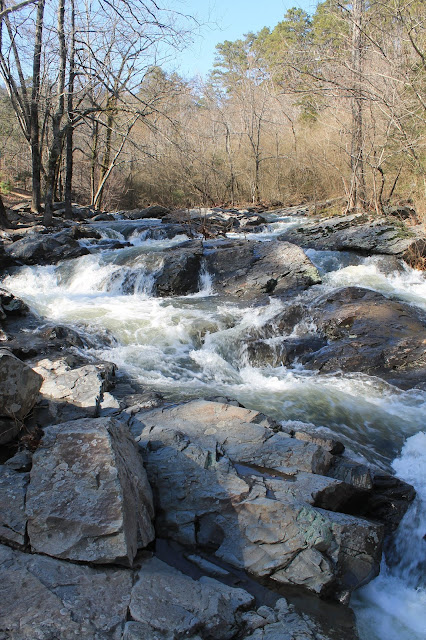
Let me also tell you my friends, this park has FULL HOOK-UPs woohoo! After staying on top of the Rich Mountain in 20-degree icy weather using tank water that froze several times, this was a major luxury. The only draw back we could possibly find was that you cannot make reservations in advance, it's first come first serve which is pretty scary when you're driving to another state. There were plenty of spots this time of year, but we're thinking it's probably a popular place in the summertime. Just look at this gorgeous river!:


The downtown area of Hot Springs is only 5 minutes down the road from the campground which was really awesome when we had to stop for naps in the middle of the day. Did I also mention both my older daughter and my husband came down with the flu on this trip?! Anyway, there are 43 thermal hot springs with a couple of them "on display" on the main street. The water comes out of the earth at 147 degrees Fahrenheit so you can't get in the water or drink it until it cools or it can be fatal. But you can reach in and touch it! 


Bathhouse row is a historic line of bathhouses with a few still in operation (we got a mineral bath/massage package!), one that has been restored into a museum and another transitioned into a gift shop/visitors center. 


Probably my most favorite part of Hot Springs were the numerous fountains located downtown that you can fill up jugs full of this amazing bountiful water. We took home three gallons and let me tell you, this was NOT enough, wah! 


Other activities we did while in Hot Springs included:


  • Superior Brewery - They make beer using the hot spring water! Nate got a flight and thoroughly enjoyed! 
  • Bathhouse Row Winery - I did a wine tasting and bought a bottle of the Merlot. These were mostly sweet wines, but they had a few dry varieties. I also want to note that this winery is kid friendly and they make juices as well that the kiddos can sample!
  • Mountain Valley Water - Their national headquarters is located here! Its a beautiful building with sparkling and flat water to buy!
  • Angel's Italian restaurant - Delicious homemade Italian food. The staff brought out two small pizza pans and dough for the girls to play with. Then they baked their creations in the pizza oven and stuffed them with chocolate so they could eat them for dessert! Highly recommend. 
  • The Arlington Hotel - This is a historic hotel built in 1875 with a bar inside the lobby. Its worth just going inside to take a look around if nothing else. 
  • Fat Bottom Girls Cupcakes - As seen on Cupcake Wars! Delicious! 
  • Hot Springs Mountain Tower - This is a large lookout tower on top of the city that you can see incredible views of the town and mountains for miles. 

If you are keeping track of our camping journal, I will share that we rated the campground and overall trip experience at a 4.9 out of 5. That's even with two of us down with the flu, one with an ear infection, two days of rain, and one day of ice. We REALLY like to camp, huh? Can't WAIT for the next adventure, I just have to finish Lysol-ing basically everything in the camper first!

Friday, February 15, 2019

TRIP: Cossatot River State Park, Arkansas

While we were camping at Queen Wilhelmina SP in Mena, we decided to take a day trip to another state park just to see more of Arkansas. Just a little over an hour was all it took to get to Cossatot River State Park-Natural Area. It is almost hard to describe how incredibly beautiful this park is.


We did get a little lost on the way there ending up at the north river crossing instead of the south. My persistent husband took us down an unpaved road to get to the right spot. See the red line on the map below for the path we took. 


It ended up being a really pretty drive in the tree processing Arkansas countryside and some well maintained gravel roads. It shaved a good amount of time off our journey had we taken a highway to get to the falls it would've taken much longer.


When we finally arrived to the correct part of the park we were blown away by the beauty of the rocks and boulders, the crystal clear water, the tall pine trees and rolling hills that completed the scenery. It was quiet and peaceful while we were there, only seeing two other adventurous souls out there aside from our family. We climbed, skipped rocks, and hiked around taking oodles of pictures.


There are no RV sites available at Cossatot SP, but there are primitive tent sites available (I'm too spoiled for that now) so the day trip worked out just fine for me! Our only regret was not packing a picnic to share at the cozy picnic areas nestled around these rapids. Maybe one day soon we will return in the summer when we can wade in these beautiful Arkansas spring waters.

Thursday, February 14, 2019

TRIP: Queen Wilhelmina State Park, Mena, Arkansas

Ya'll. We just spent six amazing last minute days in Arkansas and oh my gosh it is beautiful there, even in the middle of winter!

We kicked off the trip at Queen Wilhelmina State Park in Mena, Arkansas because we read that the views are incredible. We were not disappointed either as the park literally sits on top of a mountain and has views for days.


We arrived at sunset on the first day just in time to capture this lovely shot above with snow still on the trees and mountains in the distance. There is a nice, newly remodeled lodge at this state park which was impressive considering it held a distinct hotel feel. The lobby was large with floor-to-ceiling windows displaying the natural artistry that is the Ouachita mountains and a huge log burning stone fireplace with cozy couches nestled nearby. The park also has putt putt golf, a small train for children that goes around the ridge, an antique steam engine, playground, and a restaurant on site.

A little surprisingly, we were the only campers outside of the lodge with 30ish spots to choose from. This time of year, the park had turned off the water to the bathrooms so we had to fill up the water tank and use the pump to get water. No big deal for us...it's still luxury camping in my book when you can be a little more self sustaining! It stayed in the 20-30 degree range while up on top of this mountain for a couple of days, and looking at the below picture, I guess I can see why we were the only crazies camping in this weather.


Our trailer heater works wonders, even after 6 full days of camping and leaving the propane on around the clock, cooking and using it to heat the water, we didn't even drain one tank. We passed the time by reading while the girls played with Play-doh and marker kits I found on clearance at the grocery. I will admit as well, that once you drive down the mountain and into Mena, the weather is much more accommodating, up into the 40 degree range and no fog or wind chill.


We passed the time exploring Mena, which was a cute little railroad town. There was a great place for coffee at Ouachita Roasters...I'm talking true artistry here...see the below picture for my cardamom vanilla bean latte (swoon!):


There's a cute little visitors center at the old train depot which contains brochures for nearby things to do and some history about the area. Some very kind Mena locals worked inside the visitors center and recommended the Skyline Café for lunch, which was delicious home cooked southern food - I had chicken fried steak, and the hubby got a pork chop with fried egg on top - it did not disappoint.


Queen Wilhelmina State Park is an absolute must and is only about 4 hours from Dallas - crazy! I want to go back in the summer time and see it with all the buzzing activities. I could totally picture our in-laws coming because they could "camp" in the beautiful lodge and meet up with us by the campfire at night. 

Next up...I'll share details about our time at Cossatot State Park in Arkansas - just a short day trip from Mena. 

Wednesday, February 6, 2019

Journal it

One the things we decided to do early on, was collect our thoughts after each camping trip in a journal. This way, we could go back and reminisce on our time in the park but also use those experiences to determine going back. 


The journal was nothing special, just a freebie that I received at work actually. I took it with us on our first trip and decided that it makes the most sense to leave it in the glove compartment of the truck so we never forget it. It's also right there for me (I ride shotgun) once we get back on the road it is the first thing I reach for while our memories are still fresh. 


We've used it for three years now, and I was tired of looking at the logo on the front of it, so I put a big sticker on it and painted it! 


Much better, right? I've noticed that right after we camp is when we are the most excited and motivated to book the next trip. So I keep a copy of a Texas State Parks book with it so we can explore what other park we might want to do next. It fits perfectly up against the journal too. 


On the inside, I jot down:

  • Park name
  • City/State
  • Date of trip
  • Amount of time it took us to drive to the location 
  • 5 star rating scale
  • Activities at the park or nearby
  • Thoughts/memories/things to remember for next time

Here are a couple of example pages:


This journal is a really great resource for us. If you can't tell from the pictures, we are brutally honest when describing our thoughts and experiences, which is important to highlight. Trust me, in two years' time when you look back, you won't remember what you really thought about it all.

I've also discovered, they make camping journals now that are pre-planned out for you and all you have to do is fill in the blanks! If that is more your bag, here are a couple of super cute options on Amazon and here are a few on Etsy.

Whichever way you decide, I highly recommend recording your experiences! 

Tuesday, February 5, 2019

What Kind of Camper are you?

This is a LOADED question. There are SO many different ideologies on camping from whether you are full-time or part-time, your packing style - simplistic or glamper, and your outlook on electronics - no phones/TVs/computers purist or all the modern luxuries. But one of the most-asked questions about camper style that I hear from friends, is where do you go?

As far as I can tell, there are really two types of campers when it comes to the "where." Either you go to the same place every time, or you go to a different place every time. Yes, there are some folks who are little in between, but for the most part there are some pretty consistent campers out there doing one or the other.


Same Place-RVers

Same place RVers are those who like to book the same park and many times the same site every time. These are pretty meticulous folks who have tested their camping style from several angles and know what works from certain spots, or tried one and just REALLY liked it.

Usually, same place RVers meet other same place RVer friends and arrange to camp out at the same time - which is pretty magical if you think about it. It's like the equivalent of online dating for campers but its all done the "old fashion" way. As far as I'm concerned...if I meet a friend while camping who actually wants to see me again after getting a REAL dose of who I am sans makeup, clean clothes, not caring when my kids run around screaming and who enjoys my deep conversations over a smelly campfire...they are definitely a keeper!

Camping bonds people together in a really special way. We have several friends who book the same lakefront spot at the same lake every holiday weekend of the year. They love it and there isn't much convincing them to go anywhere else. I say do what works for your family and hold true to it. Once you start following the pressures of others, you start to lose sight of why you started camping in the first place and fun starts to be work.


Wanderers

My husband and I definitely fall into this category, mainly because of our love of history and constant desire to learn. Life is too short to see the same things over and over again especially when there is so much out there. We are consistent with this mindset too, when it comes to books and movies we hardly ever watch or read the same one twice. We have been to almost every state park in the state of Texas, and have started branching out to RV parks and LCRA land as well as out-of-state camping to keep it interesting.

Wanderers have an insatiable craving for adventure and usually do really well with change and being amenable to most situations. "This site doesn't have an even concrete pad? No problem, we can just stack blocks to teeter the camper to *just the right* angle to not fall out of bed."


We also try to pair our camping location with really neat nearby festivals, museums, or towns to explore. Of course, this can backfire on us when family or friends want to go to a park that we've been to before. In which case, we may bend a little for the good of the group and see the same place again.

The heart of the matter is that we LOVE traveling. Before kids, we left the country once or twice a year and pretty consistently spent weekends in other cities and states. Today, however, as those of you with young families know, this is much harder to accomplish with toddlers on a nap schedule who have to be fed every few hours and can't be confined for too long on airplanes. Wandering with our camper has become our way to continue travelling while exposing our littles to new and different areas, ideas and concepts. Our RV trailer feels like a second home with all of our creature comforts and makes it easy to travel without feeling a lot of the pressures of air travel with perfect, quiet children (does that really exist?!).

Now, if someone can help me, I'd love to convince my hubs to travel a little further out, like maybe South Dakota or Maine...I haven't accomplished that quite yet but there's still time!